

ROOF LEAK DETECTION · WEST PALM BEACH, FL
24/7 Roof Leak Detection in West Palm Beach.
A roof leak rarely drips where it starts. Water gets under a cracked tile or a failed flashing, travels along the decking or down a rafter, and finally shows up as a stain on a ceiling — often in a room far from the actual entry point. That’s why roof leak detection West Palm Beach FL starts with finding the entry point, not patching the stain. Here’s how a detection visit works.
✓ Serving West Palm Beach & surrounding areas
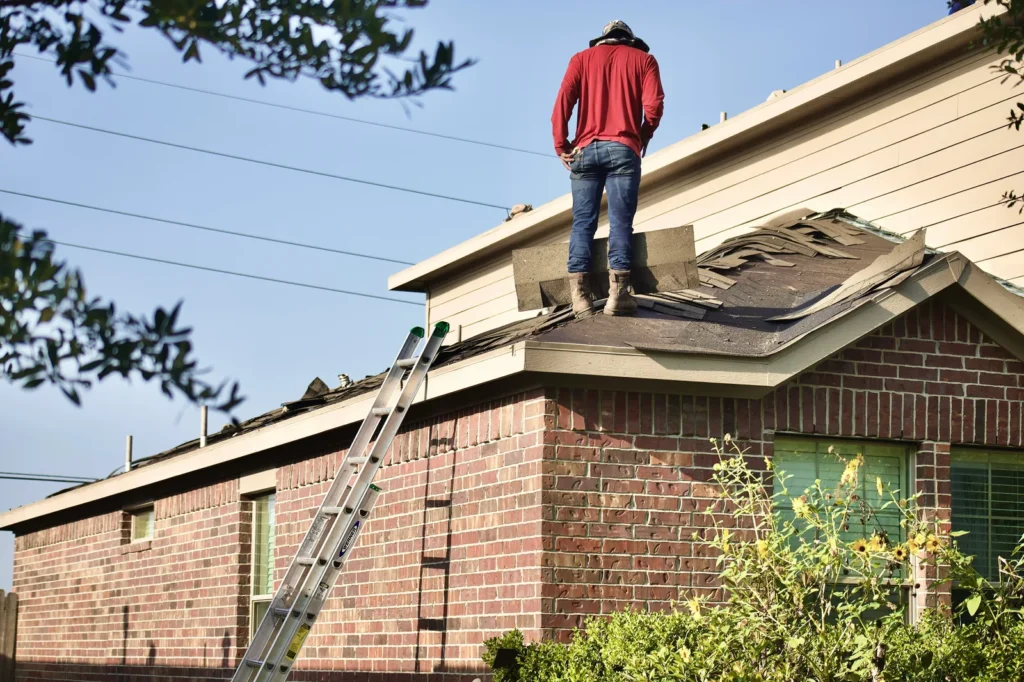
That’s why finding the entry point matters more than patching the stain. Leak Detection West Palm Beach provides non-invasive roof leak detection in West Palm Beach, FL using thermal imaging and moisture meters — the same technology behind our thermal leak detection scans for plumbing — to trace water back to where it actually gets in. In most cases that means no exploratory holes in your ceiling and no lifting tiles at random.
Signs of a roof leak in a Florida home
Florida roofs take a beating that roofs in most states never see. Here’s what to watch for:
- Brown or yellow stains on ceilings or upper walls — the classic sign, and almost never directly under the leak
- A musty smell in the attic or upstairs rooms, especially after rain
- Paint bubbling or peeling on soffits, fascia, or exterior walls near the roofline
- Water dripping or damp insulation visible during or right after a storm
- Cracked, slipped, or missing barrel tiles on tile roofs — the underlayment beneath is the real waterproofing, and it fails first
- Ponding water or blistered seams on flat or low-slope roofs
- Mold or mildew spots on the underside of the roof decking
- Bubbling or soft, damaged drywall on ceilings or upper walls
- Daylight visible through the roof boards from inside the attic, where it can be safely observed from the ground or attic — never climb onto the roof to check
- Rust stains around flashing, vents, or other roof penetrations
- Gutters that clog or overflow, sending water back toward the fascia and roof edge
- Sagging, rotted, or damaged fascia boards
- Attic insulation that looks damp, flattened, or matted down
- Dark stains on the roof decking or rafters that don’t wipe away
No single sign on its own proves a roof leak — each one points to moisture that needs to be traced to its source. And none of them is worth climbing onto a roof to check; if you can’t see it safely from the ground or the attic, leave the roof to someone with the right equipment.
After hurricane season especially, wind-driven rain finds every weak flashing, vent boot, and skylight curb. If a storm passed through and something looks different afterward, it’s worth checking before the next one arrives.
Why the stain is rarely the leak
Water obeys gravity and follows the path of least resistance. On a pitched roof it runs down the underlayment or decking until it finds a fastener hole or a seam, then drops into the attic — sometimes ten or twenty feet from where it entered. Patching the ceiling stain treats the symptom while the water keeps coming in. Detection first, repair second — in that order.
Common roof leak locations
Most roof leaks start at the same handful of weak points. Here’s where they happen, what they look like, and how each one is checked.
Roof flashing joints. Flashing seals the joints where the roof meets a wall, a chimney, or another roof plane. It expands and contracts with heat, and over time the seal can lift or crack. Water that gets behind flashing runs along the decking before it shows inside, so the stain can be far from the joint. Homeowners often notice a stain on the wall below the joint, or dampness after wind-driven rain. Flashing is checked visually for gaps, lifting, and rust, and with a moisture meter on the surfaces below it.
Chimney flashing. The metal flashing around a chimney base is one of the most leak-prone details on a roof, because the chimney and the roof move differently with temperature. Look for water stains on the ceiling near the chimney, or dampness in the attic around the chimney. Inspection covers the step flashing, the counter-flashing, and the seal where the two meet.
Skylight curbs and flashing. Skylights sit in a raised curb with flashing around all four sides, and the curb itself can crack or the flashing can lift. A leak here often shows as a stain on the ceiling around the skylight, or drips during heavy rain. The curb, the flashing, and the seals are inspected from the roof surface and from the attic below.
Pipe boots. The rubber boot that seals around a plumbing vent pipe dries out and cracks in the Florida sun — often within a few years. A cracked boot lets water run straight down the pipe into the attic. The sign is usually a stain on the ceiling near a bathroom or kitchen vent. Boots are checked visually for cracks, and by tracing moisture around the pipe from inside the attic.
Plumbing vents and roof penetrations. Every pipe, vent, or fixture that passes through the roof is a hole that has to be sealed, and each seal can fail — cracked boots, dried sealant, or a vent stack that has shifted. Stains near vent locations, or dampness in the attic around penetrations, are the usual clues. Each penetration is inspected for seal condition and for moisture below it.
Roof valleys. Valleys channel more water than any other part of the roof, so a small failure there lets in a lot of water fast. Debris builds up in valleys, shingles or tiles wear faster there, and the flashing underneath can corrode. Look for stains along the line of a valley inside the house, or for wear and debris in the valley itself. Valleys are checked for wear, debris, and the condition of the flashing beneath.
Sidewall and roof-to-wall transitions. Where a sloped roof meets a vertical wall — a dormer, an addition, a second story — the flashing has to turn a corner, and that corner is a common failure point. Water stains on the wall below the transition, or dampness in the rooms behind it, are typical signs. The step flashing and the wall’s water barrier are checked together.
Cracked or slipped roof tiles. A cracked tile lets water through to the underlayment, and a slipped tile leaves a gap in the coverage altogether. From the ground you may spot a tile that’s out of line or a gap in the pattern; from the attic, dampness below the damaged tile. Tiles are checked visually, and the underlayment beneath a damaged tile is checked with a moisture meter.
Missing or lifted shingles. Wind lifts shingle tabs and tears them off, leaving the underlayment — or bare decking — exposed to the next rain. Missing shingles are often visible from the ground; lifted ones show as a raised or curled edge. The exposed area is checked for water entry and for damage to the shingles around it.
Failed tile roof underlayment. On tile roofs the tiles shed most of the water, but the underlayment is the real waterproofing — and it ages, cracks, and fails, sometimes while the tiles above still look fine. This is the most common hidden failure on South Florida tile roofs. It shows as stains or dampness with no visible tile damage, and it’s confirmed by moisture readings in the attic below the suspect area.
Flat roof seams and membrane failures. On flat and low-slope roofs, the seams between membrane sheets and the flashing at edges and penetrations are the weak points. Seams open up with age and heat, and ponding water keeps them wet. Signs include blistered or bubbled membrane, stains on the ceiling below, and damp insulation. Seams and flashings are checked visually and with moisture readings below.
Ponding water and drainage problems. Water that stands on a flat or low-slope roof for more than a day or two stresses every seam and penetration it touches, and it finds the smallest opening. Look for standing water after rain, clogged drains or scuppers, and stains below the ponded area. Drainage is checked first — clearing a blocked drain sometimes stops a leak on its own — then the seams under the ponded water.
A stain on the ceiling rarely sits directly below the entry point. Water travels along decking and rafters before it drops through, so the leak you see is often feet away from the leak that started it.
Tile, shingle, and flat roofs leak differently
South Florida homes wear a few different roof types, and each fails in its own way.
- Tile roofs. The tiles shed most water, but the underlayment does the waterproofing. Cracked underlayment beneath intact-looking tiles is the most common hidden failure we see.
- Shingle roofs. Flashing failures around vents, chimneys, and skylights cause most leaks; the shingles themselves usually show visible wear first.
- Flat and low-slope roofs. Ponding water stresses seams and penetrations, and the leak often appears far from the ponding area. Commercial buildings with flat roofs face the same problem at larger scale.
Knowing which type you have tells us where to look first — but the instruments confirm it.
How roof leak detection works
- Visual inspection first. We check the roof’s vulnerable points — flashings, vent boots, skylight curbs, valleys, and tile condition — plus the attic or ceiling space below. What we can see from the roof surface and the attic tells us where to aim the instruments.
- Thermal imaging scan. An infrared camera scans the roof surface and the ceilings below. Wet insulation and decking hold temperature differently than dry materials, revealing moisture patterns invisible to the eye. Thermal imaging shows temperature patterns that may be associated with moisture — it points to where water has been, but it doesn’t independently confirm every leak on its own.
- Moisture meter confirmation. Readings map which areas are wet and which are just stained from an old, dried-up leak — an important distinction. Meters measure dampness where we can reach the material, so they confirm what the camera suggests rather than replacing it.
- Controlled water testing. When conditions allow, we trace the path from a suspect entry point to the interior stain, confirming the diagnosis. Water testing is used selectively — it can confirm a suspected leak path, but it isn’t appropriate in every situation, and it doesn’t prove a roof is leak-free elsewhere.
- A marked location and a clear report. Where the evidence points to an entry point, it’s marked on-site, with an explanation you can hand directly to your roofer. If the evidence doesn’t confirm a single entry point, the report says so — along with what was found and what the next step should be.
Roof leak detection vs. a general roof inspection
A general roof inspection checks the overall condition of a roof — the age and wear of the covering, the state of the flashing, gutters, and penetrations, and whether anything needs attention soon. It’s a health check. Roof leak detection is different: it starts with a specific problem — water getting in — and works backward to find the exact entry point. An inspection tells you the roof is aging; detection tells you where the water is coming from and gives your roofer a defined place to fix. If you already know water is getting in, detection is the right call. If you just want to know how your roof is holding up, an inspection is.
Roof leak detection vs. roof repair
Detection and repair are two different jobs. Detection investigates the source: finding where water enters, using visual inspection, thermal imaging, and moisture readings. Repair addresses the failed roofing component — replacing flashing, resealing a penetration, or fixing underlayment. A roofer performs the repair after the source is identified. That order matters: repairing before the entry point is confirmed often means fixing the wrong spot while the real leak keeps going.
What happens during a roof leak detection appointment?
A typical visit starts with a short conversation about what you’ve noticed — where the stain is, when it appears, whether it follows storms — then moves to the roof and attic. The roof surface is inspected at its vulnerable points, the attic or ceiling space below is checked, and thermal imaging and moisture meter readings are used to trace the moisture back to a likely entry point. Where the evidence points to a source, it’s marked on-site and explained to you, so you can pass the findings to your roofer. How long a visit takes depends on the size and complexity of the roof and how many suspected leak locations there are — there’s no fixed appointment length, and no result is guaranteed in advance.
Roof leak detection cost in West Palm Beach
There is no single price for roof leak detection, because the work depends on the roof. The main factors are the size of the roof, the roofing material, how accessible the roof and attic are, how complex the suspected leak is, whether thermal imaging or controlled water testing is needed, and how many suspected leak locations have to be checked. A small, accessible shingle roof with one suspect area is a simpler job than a large tile roof with several possible entry points. Call (728) 224-6444 and we’ll give you a price before any work begins — and for the factors that shape leak detection pricing generally, see our cost guide.
Roof leak detection after Florida storms
After a storm, wind-driven rain pushes water into places ordinary rain never reaches — under lifted shingles, around flashing, and through gaps a calm day would never expose. The most common storm damage we see is slipped or missing tiles, lifted shingle tabs, flashing pulled loose at chimneys and skylights, and penetrations that shifted in the wind. A stain that appears after a storm doesn’t always mean the roof failed in the storm — sometimes the storm just revealed a weakness that was already there. Either way, the right move is the same: find the entry point before the next storm arrives, document what you find, and pass it to your roofer. If you’re filing an insurance claim, that documentation matters — photograph the stain and the marked location.
What your roof leak detection report includes
After the visit, you get the findings in a form you can hand to your roofer: the suspected entry point (or points) as identified on-site, what was observed at each one, the moisture patterns found by thermal imaging and meter readings, and the recommended next steps. Where the evidence doesn’t confirm a single entry point, the report says so — along with what was ruled out and what should happen next. Photograph the stain and the marked location for your records — that documentation is useful if you file an insurance claim.
What Happens After Roof Leak Detection?
Once the entry point is identified and marked, the repair is usually straightforward — a roofer replaces flashing, reseals a penetration, or repairs underlayment in one defined area. Our findings give your roofer a defined area to quote and fix, instead of exploratory work that tears into sound roofing to hunt for the leak. The repair itself depends on your roof type and the confirmed failure: replacing failed flashing, resealing a penetration, or repairing underlayment in one contained spot. Because the location was confirmed with thermal imaging and a moisture meter before any work began, your roofer can move straight to the fix. Detection is our job; the repair itself is your roofer’s. Bring them the findings and the marked location, take photos of the stain and the marked entry point for your records, and if you file an insurance claim after storm damage, that documentation matters.
Roof leak detection across West Palm Beach
We provide roof leak detection across West Palm Beach, from the historic neighborhoods near downtown to the newer communities out west. Our home base is Leak Detection West Palm Beach, and we serve the greater West Palm Beach area every day.
If there’s a stain on your ceiling, there’s water getting in somewhere. If you need roof leak detection West Palm Beach FL, call (728) 224-6444 and we’ll investigate where it’s coming from.
Frequently asked questions
Can you find a roof leak if it isn’t raining?
Yes. Thermal imaging detects the temperature differences left by trapped moisture, and moisture meters read dampness in decking and insulation directly — neither requires active rain. In fact, a dry day after a storm is often ideal, because the wet areas stand out clearly against dry surroundings.
The stain is in my living room — is the leak right above it?
Usually not. Water travels along decking, rafters, and underlayment before it drops through the ceiling, so the entry point is often many feet away from the stain. That’s exactly why detection matters: patching above the stain usually misses the real leak.
Will you have to cut into my ceiling or lift my roof tiles?
Usually not. Detection relies on thermal imaging, moisture meters, and visual inspection, so in most cases nothing is cut or lifted. If the evidence doesn’t confirm a leak path that way, further investigation may be needed — and that would be discussed with you before anything is opened up.
Should I call a roofer or a leak detection specialist first?
Detection first. Once the exact entry point is marked, your roofer can repair one defined area instead of doing exploratory work across the roof. It saves time, limits damage, and gives you a clear scope to get quoted on.
How much does roof leak detection cost in West Palm Beach?
There’s no single price — it depends on the roof’s size and material, accessibility, the complexity of the suspected leak, and how many locations need checking. Call (728) 224-6444 for a price before any work, and see our cost guide for the factors that shape pricing.
How long does roof leak detection usually take?
It depends on the roof. A small, accessible roof with one suspected leak location is usually a single visit; a larger roof, a tile roof with several possible entry points, or a leak that needs controlled water testing takes longer. There’s no fixed appointment length — the time depends on the size and complexity of the roof and how many locations need checking.
Can a small roof leak cause major damage?
Yes. A small, steady leak can soak insulation, rot decking and rafters, and feed mold growth for months before it shows as a stain — and by then the damage is often much bigger than the leak. That’s why a stain, even a small one, is worth investigating rather than painting over.
Do you inspect tile, shingle, and flat roofs?
Yes. Tile, shingle, and flat or low-slope roofs are all covered — each fails differently, so the inspection starts with the roof type and looks where that type most often leaks: underlayment on tile roofs, flashing on shingle roofs, seams and drainage on flat roofs.
What technology is used for roof leak detection?
Thermal imaging, moisture meters, and visual inspection. An infrared camera finds temperature patterns that may be associated with trapped moisture, moisture meters confirm which materials are actually damp, and a visual inspection of the roof and attic ties the two together. Controlled water testing is used when conditions allow and a suspected path needs confirming.
Can roof leak detection help after a storm?
Yes. Wind-driven rain exposes weak flashing, slipped tiles, and lifted shingles that ordinary rain never reaches. Detection after a storm finds the entry point and documents it — which also helps if you’re filing an insurance claim.
What happens after the roof leak is identified?
The entry point is marked on-site and the findings are documented so you can hand them to your roofer. Your roofer then repairs the failed component — flashing, a penetration seal, or underlayment — in the defined area, instead of doing exploratory work across the roof.